Google is making a big push to get sites secure and soon it’ll be a requirement if you want to keep all your web traffic. While the process may seem intimidating, it’s really not. In a matter of minutes, you can have a secure site and reap the benefits (more confident visitors, better Google ranking, less security worries, and more). Here’s a super simple guide to going secure on WordPress.
Guide To Going Secure
The hardest part of securing your website is getting a certificate. Luckily, it’s become really easy thanks to Let’s Crypt, a free, automated, and open certificate authority that’s sponsored by many major web companies including Chrome, Automattic (the makers of WordPress), the EFF, Facebook, and others.
Please note that before making any major changes to your WordPress site you’ll want to make a full backup. While nothing bad should happen during this process, it’s always best to have a backup copy should something unexpected happen. As my friend Marko use to say, “Blessed are the paranoid, for they have backup.”
Getting A Secure Certificate
The easiest way to get your certificate is to check with your hosting provider. Many now offer Let’s Crypt support built into their user dashboards. This makes it super simple to request a certificate for your site, have it installed with only a click or two, and automatically renewed.
If you don’t see a Let’s Crypt option in your hosting provider dashboard, reach out to your provider and see if they can get it setup for you.
Once the certificate is installed, you should be able to visit https://yoursite.com and see the little lock icon appear in your browser address bar (something like the image at the top of this guide). Congrats! Your site is now secure, but there’s still a bit more work to do to make sure everything is happening over secure channels.
Securing WordPress Login
You’ve got the start of a secure site, now you want to make sure that WordPress forces you to sign in through a secure login. This will protect your administrator login and password when signing into your site.
To force a secure login, you’ll need to add a bit of code to the wp-config.php file in the root directory of your WordPress installation. You can edit it using your hosting account’s editor or FTP into your site and edit it using your FTP client.
Once you’re in your wp-config.php file, find the following line:
/* That’s all, stop editing! Happy blogging. */
Directly above it, type these two lines:
define(‘FORCE_SSL_ADMIN’, true);
define(‘FORCE_SSL_LOGIN’, true);
Once you’re done editing, it should look like this:
define(‘FORCE_SSL_ADMIN’, true);
define(‘FORCE_SSL_LOGIN’, true);
/* That’s all, stop editing! Happy blogging. */
Save the file and try going to the non-secure login page of your site (http://yoursite.com/wp-admin). If you’re redirected to the HTTPS URL for the login page, you’ve done it right!
Secure WordPress
Now you’ll want to let WordPress know that your site is secure.
To do this, go to Settings > General
Update the WordPress Address (URL) and Site Address (URL) to reflect the new https address of your site, as seen below.
Click the ‘Save Changes‘ button and WordPress will update your URLs automatically.
Redirect Insecure To Secure
We now want to make sure your website redirects any attempts to access an insecure URL to a secure one. This will prevent anyone from visiting an insecure page by mistake.
To do this, you’ll need to edit the HOST file for your website. This can be done in the same way you edited the wp-config.php file, via hosting account editor or FTP (or SSH for you fancy folks).
Find the line:
RewriteEngine On
Paste the following right below it:
RewriteCond %{HTTPS} off
RewriteRule ^(.*)$ https://%{HTTP_HOST}%{REQUEST_URI} [L,R=301]
Save the HOST file and attempt to access any insecure URL on your site (the homepage is fine). You should see yourself redirected to the HTTPS address instead. If this happens, you’re good to go on to the next step in this guide to going secure.
Update URLS
Even though we updated the website URL in the WordPress settings, there may still be some URLs that haven’t been updated. These are often images and other resources which are contained in blog posts. Rather than go through each post, we can update them in bulk to save a ton of time.
The plugin Search & Replace makes this really simple. After installing and activating, head to the ‘Search and replace‘ tab (you can find the plugin under the Tools menu).
In the ‘Search for:‘ field, put your old insecure URL http://yoursite.com
In the ‘Replace with:‘ field, put your new secure URL https://yoursite.com
Check the ‘Select all tables‘ box, be sure to leave the ‘Dry Run‘ box checked and click the ‘Do Search & Replace‘ button. This will find all insecure URLs within your site but won’t replace them quite yet. It may take a minute or two if you’ve got good sized site, so be patient.
After the dry run is complete, Search & Replace will show how many instances it found to update. Make sure this number seems reasonable. If you have a small site but the number is in the millions, something else is going on and you may want to try again.
Verify that your search and replace URLs are correct (if they aren’t you could cause all kinds of problems), and re-run the search & replace, this time with the ‘Dry Run‘ box unchecked.
The links and images within your site should now be updated to secure URLs.
Time To Test
Most of your website should now be secure but there may still be some elements that aren’t. Some browsers won’t show the little lock icon unless all local elements are secure, so you’ll want to find and clean them up.

Run a search of the site, then click the HTTP section under Protocol on the right to see which pages still contain insecure links or content.
Fix the links you find, run Screaming Frog again, then repeat. It might take a couple passes but the numbers drop quick once you find the culprit, as they’re usually across multiple (or all) pages of your site.
One place that can contain old URLs in WordPress is post comments. These come from replying to comments on your site. You can use phpMyAdmin to edit the wp_commentmeta and wp_comments tables. Use the search function to find any old URLs and update them as shown in this guide.
Other spots that often causes insecure URLs across the site is Widgets and Menus. Be sure to check both of these under the Appearance menu in WordPress. Check those footers too.
Once you’ve cleaned everything up, it’s time to get a second opinion. Run your site through the Qualys SSL Server Test, Jitbit SSL Check, and Why No Padlock? to verify your site is secure.
Prevent Insecure Links From Coming Back
To keep your site secure, there are a couple steps to keeping insecure links from seeping back into your site.
Make sure you use HTTPS links whenever linking internally going forward. Doing so will prevent you from having to go back and clean up your links in the future. The WordPress linking function within post creation will automatically insert secure URLs, so if you’re using it you’re good to go.
One other spot that’s often overlooked is WordPress user profiles.
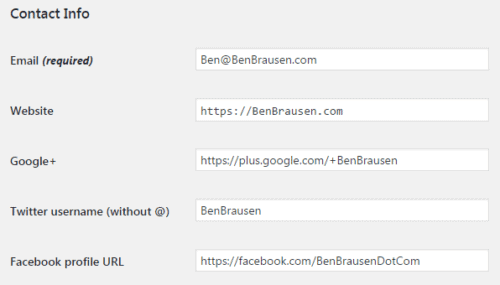
Be sure to update the Website section of all WordPress users to the new secure URL. Failure to do so will result in insecure links within comment replies and more unneeded cleanup effort.
Going The Extra Mile
This step is optional but will help make sure your site is only accessed securely.
HTTP Strict Transport Security (HSTS) will force browsers to make only secure requests of your site. It’s just another step in making sure all connections are secure. Here’s a great guide to enabling HSTS on WordPress.
Once you’ve done this, you can request your site be included in Chrome’s HSTS preload list here. Sites on this list are hardcoded into Chrome as being HTTPS only.
While not necessary, this extra step will make things as secure as can be.
All Secure
You’re all set. This guide to going secure should be all you need to make the transition to HTTPS on your WordPress site.


